Flying Disc Week

A five-day program that introduces students to the sport of flying disc. The emphasis is on respect, physical activity, fun, and exploring what’s possible through simple, teachable modules.
This curriculum is built using modules — start with the Throw & Catch module!
- Throw & Catch – learn the fundamentals fast, then jump into mini games.
- Ultimate – 8 simple rules, nonstop movement, and Spirit of the Game.
- Disc Golf – accuracy challenges and creative course-building.
- Freestyle – tricks, spins, and the “disc trickster” pathway.
- Throw, Run, & Catch – add athleticism and movement to disc skills.
- Invent Games – creativity-first play with endless possibilities.
Flying Disc Week Modules
This curriculum is built using modules – start with the Throw & Catch module!

Throw & Catch
Learn how to throw and catch the disc! Once you get the hang of it, try one of our mini games!
Ultimate
Like to run around and play team sports? Learn the 8 simple rules to play Ultimate and try to keep up!


Throw, Run, & Catch
Want to learn the basic ways to incorporate athleticism to disc sports? Check out Throw, Run, Catch!

Throw & Catch
Teach throwing & catching quickly and easily so students can go try it right away.
There are 3 parts to every throw: Grip, Spin, and Power. There is no wrong way to hold a frisbee, but there is a right way to throw every single throw.
- Grip: The grip will determine what throw is being thrown. For every throw, the grip of the disc must be tight, so that you can get the most amount of spin and power.
- Spin: To make the disc fly, we need to put lots of spin on the throw. We do this by snapping/flicking our wrist. Spin gives the frisbee lift and helps create glide.
- Power: Power control is important no matter what disc you’re throwing. We do this by slowing down our motion or using less force from our arms and/or legs.
Once you have the 3 steps figured out, you’ll want to get into an athletic stance.
Stance
Every throw is diferent, and the stance for every throw is diferent as well.
- For the backhand, you’ll step with the same foot as your throwing hand.
- For the forehand, you’ll step with the opposite foot of your throwing hand.
- Step towards your target and release the disc towards your target.
Catching
There are two parts of the frisbee you can catch:
- Top and bottom (with 2 hands) OR
- The rim (with 1 or 2 hands)
Teaching Basic Throws
Traditional Backhand
- Place thumb on top of the disc with 4 fingers underneath the disc. It’s as though you are shaking hands with the disc. You do not want the index finger along the rim for the backhand.
Traditional Forehand
- Fingers in the shape of a gun – two fingers underneath, thumb pinches on top of the disc.
- Squeeze disc predominantly with those 3 fingers, but also with other two fingers to stabilize disc in your hand.
- IMPORTANT: focus on keeping the forearm and palm up to the sky when throwing.
Troubleshooting
Wobbling Disc
- Use more wrist snap and less arm movement. You can throw the disc further than you think with just a snap of the wrist.
Disc not going straight
- Point at the target you’re throwing to after you release the disc.
Disc not staying level
- Keep disc flat throughout the whole throwing motion. For the forehand throw, keep palm and forearm flat up to the sky.
Skill Games for Throwing & Catching
- Partner Catch – Have students high five and take two steps back. This game isn’t about distance, but rather about power control. The goal of the game is to get 30 catches in a row. Throw the disc to your partner with appropriate power that they can catch it. Not too soft and not too hard. If you’re having difculty catching, move closer. If you’re catching everything, keep going as you are.
- Throw How You Catch – this time, you’ll throw to your partner the same way that you catch the disc. If you catch with 2 hands, throw it back with 2 hands. If you catch the disc upside down, throw upside down. If you drop the disc on the ground, throw the disc exactly how you pick it up. The key is that the grip will constantly be changing, all dependent on the catch. So every throw will have a diferent grip, and the challenge will be to always have spin and appropriate power on the throw to your partner.
- Invent a Throw – only 2 rules for this game – the throw has to be safe, and has to be catchable. Have each partner make up a new throw. Could be one throw that they keep trying, or could be a diferent throw every time.
- Throw Under the Leg – instead of throwing a flat backhand, turn the disc sideways and throw a gentle vertical backhand. Spin and power control will be key in this game. Throw under the same leg as your throwing hand towards your partner.
- Catch Under the Leg – the same throw as the previous game but this time, instead of throwing the disc under your leg, your partner will be attempting to catch the disc under their leg.
- Dueling Throws – going back to the Partner Catch, except this time, everyone will have a disc in their hand. Both partners will throw at the exact same time, throwing and catching a backhand.
- 2 Disc Throw – this time, one partner will have both discs in their hand and will either throw both discs in one hand, or throw one disc from each hand. Either way, they will throw both discs at the same time to their partner, who will attempt to catch both discs.
Speed Flow
Objective
- Pass the disc back and forth as many times as possible between partners in 1 minute.
Purpose
- Used to gauge the improvement throughout a week of the Flying Disc curriculum . This activity should be done on the first and last day of the week to measure success.
How to Play
- Two students of the opposite gender will line up 15 feet apart facing each other.
- With a third-party starting a stopwatch, the pair will begin to pass the disc back and forth.
- The pair can use a backhand, forehand, or other creative throw that allow them to get the disc back and forth as quickly as possible.
- The third-party will signal a stop at the 1 minute mark, and the number of times each student caught the disc will be the total of their score.
Helpful Video: https://www.youtube.com/watch?v=f4yiyOpkH2s
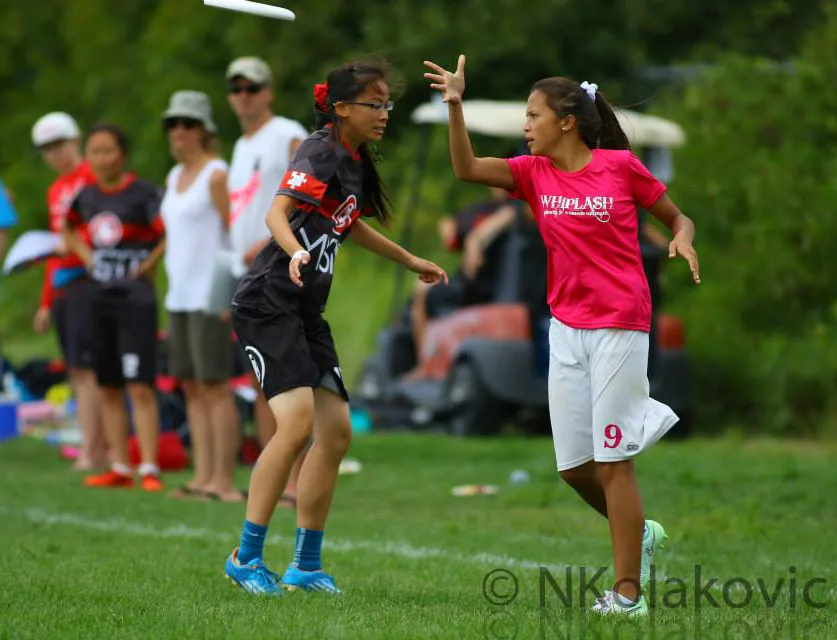
Ultimate
What is Ultimate?
Although ultimate resembles many traditional sports in its athletic requirements, it is unlike most sports due to its focus on self-officiating, even at the highest levels of competition. This concept, called Spirit of the Game, is integrated into the basic philosophy of the sport, written into the rules, and practiced at all levels of the game from local leagues to the World Games.
Combining the non-stop movement and athletic endurance of soccer with the aerial passing skills of football, a game of ultimate is played by two teams with a flying disc on a field with end zones, similar to football. The object of the game is to score by catching a pass in the opponent’s end zone. A player must stop running while in possession of the disc, but may pivot and pass to any of the other receivers on the field. Ultimate is a transition game in which players move quickly from offense to defense on turnovers that occur with a dropped pass, an interception, a pass out of bounds, or when a player is caught holding the disc for more than ten seconds. Ultimate is governed by Spirit of the Game™, a tradition of sportsmanship that places the responsibility for fair play on the players rather than referees. Ultimate is played in more than 100 countries by an estimated 7 million of men and women, girls and boys. The international governing body, WFDF, represents 86 member associations in 84 countries.
From: https://www.usaultimate.org/about/ultimate.
Introduction
- Introduce the game, explain the rules, emphasize Spirit of the Game
- Playing Field: Set up a field with cones at the 8 corners of endzones. Use whichever field size is available.
Warm Up
- Pick 1 warm up drill (below)
“Cut to!” Drill
Objective: Get students making lots of easy throws and catches.
- Place two cones 20-30 yards apart. Have students line up facing each other behind the cones. One disc. Have students pass the disc back and forth in between the two cones, one student at a time. Once a student has caught and thrown the disc, they will cycle into the back of the opposite line. Give students a goal to reach:
- time limit
- number of completed passes in a row
- Don’t run while throwing! Slow down and set your feet, and then throw.
- Run as many drills at a time as necessary to keep all students engaged.
Advanced:
- Split students in 2+ groups and have them race each other to go 2 times through
- Only throw with forehand
- Only catch with non-dominant hand
- Don’t slow down as you are receiving the disc! In Ultimate, defenders LOVE when you slow down because it gives them time to catch up.
3 Person Marking Drill
Objective: Learn what a “stall” is and throw under pressure. Learn the need for both forehand and backhand. Get a lot of throws and catches in!
- 3 students. One disc. 2 students stand 10-15 yards apart and will not move until the pass is completed. The 3rd student is marking the student with the disc.
- The student with the disc is only able to pivot. The student receiving the disc is not allowed to move. The 3rd student is trying to prevent the thrower from completing a pass by guarding or “marking” the thrower.
- Remember, the student defending the student with the disc is called the “mark.” The “mark” says “Stall 1…2…3…4…” trying to get to “10” which would result in a turnover.
Huck Drill – a “Huck” is a really long throw
Objective: Have fun! Always the most liked drill from students. Works on reading the disc and throwing it far.
- Two cones 2 yards apart. One is o ensive line (further from thrower). Other is defensive line (closer to thrower). One throwing line 10 yards away, but even with the other cones.
- Thrower says “3,2,1 go!” Both runners run STRAIGHT (imagine a “go” route)
- Thrower does their best to throw the disc to the offensive player
- Remind players to rotate between the 3 lines. Thrower, defense, offense, etc.
Advanced
- Teach “UP!”
- Easiest way to do this is yell “UP” every time the disc is thrown. Then ask why you are yelling it. “So your teammates know that the disc is thrown and to look for it.”
- Teach “Reading the disc”
- The disc will naturally curve to one side and speed up as it falls to the ground.
- Learn how to predict where the disc is going to land by seeing the curve of the disc and run towards its landing point right away
Play Ultimate
8 Simplified Rules to play Ultimate
- To Start Each Point: Teams line up on their end zone line. The defense throws pulls) the disc to the offense.
- Passing:
a. You cannot run with the disc in hand.
b. The thrower has 10 seconds to throw disc to teammates - Scoring: The team on offense, scores a goal when they complete a pass in the other
team’s end zone. A goal = 1 point. - Turnover: When a throw is dropped, blocked, intercepted, or out-of-bounds, the defense now takes control of the disc and becomes the offense.
- Non-contact: No physical contact is allowed between players.
- Fouls: A foul occurs when contact is made and it is up to the players involved to call a foul.
- Self-refereed: Players call their own fouls and calmly resolve the respect.
Advanced Rules: See www.usaultimate.org/rules
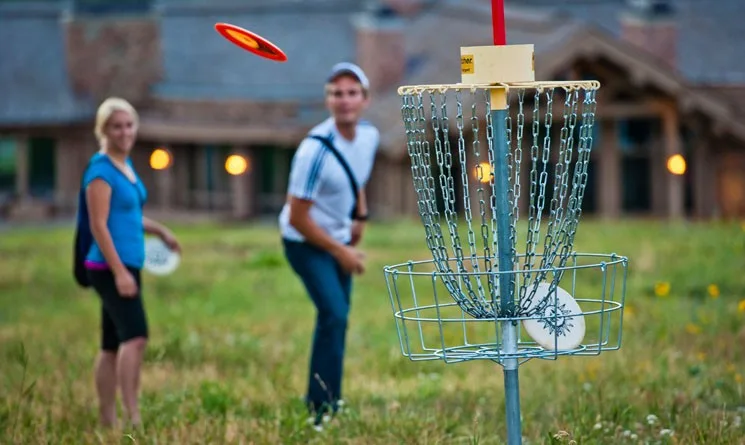
Disc Golf
What is Disc Golf?
Disc golf is played much like golf. Instead of a ball and clubs, though, players use a flying disc or frisbee. The sport was formalized in the 1970s and shares with golf the object of completing each hole in the fewest strokes (or, in the case of disc golf, fewest throws). A golf disc is thrown from a tee area to a target, which is the “hole.” The hole can be one of a number of disc golf targets; the most common is an elevated metal basket. As a player progresses down the fairway, he or she must make each consecutive throw from the spot where the previous throw landed. The trees, shrubs, and terrain changes located in and around the fairways provide challenging obstacles for the golfer. Finally, the “putt” lands in the basket and the hole is completed. Disc golf shares the same joys and frustrations of golf, whether it’s sinking a long putt or hitting a tree halfway down the fairway. There are a few differences, though: Disc golf is often free to play in public parks, although pay-to-play courses are trending upward; you probably won’t need to rent a cart, but converted golf course layouts are also on the rise; and your “tee time” will usually come during tournament competition, not casual play.
Basics
– Like golf but instead of hitting a ball into a hole, you throw a disc at a target (basket). – Go over basic rules including etiquette (don’t stand too close to the thrower and make sure no one is in your way when throwing). – If you don’t have a disc golf basket, use a tall cone, portable basketball net, or anything else that can be used as a throwing target
Putting
As if you’re playing catch with the target throwing a backhand Have everyone stand in a circle around the target and do a few rounds (3-4) where you go around the circle one at a time, getting students to putt at the target. After each round, take one step further back to increase the challenge. Ring of Fire: After you’ve done a few rounds, do a group Ring of Fire, where everyone will putt at the same time. You can keep going further away after each round and challenge them. Try not to go too far away because you want to keep this a putt. Option: Elimination version of Ring of Fire. After each round, only those who have hit the target remain in the game – keep going until only one student is left. Option: Putt with a forehand Option: Putt throwing the disc under their leg or with the opposite hand
Driving
– Have students stand about 200 feet from the basket/target and really challenge them to throw it as far as they can. For this activity, you want students to work on their max distance. – Work on backhand/forehand. – Try to have one student at a time go and unless you see something major, don’t suggest too many corrections. – Mention that the world record is about 3.5 football fields (1108 feet) and mention that the roller world record is about 12 football fields (1.1 km). For sure there will be some throws that turn into rollers, so this is a good opportunity to talk about how a roller could be a good throw, depending on the ground conditions, and the hole placement.
Playing
– Depending on the number of students you have, create 2-4 holes so there are 5-8 students at each hole. If you need to create more than 2 holes, use trees or other targets in the area. – Set up each hole with 2 cones as the tee box and make it flow so they can go around the circuit. You could each have 2 tee boxes for each basket, depending on the number of students who show up. – Utilize the staff/volunteers – have one go with each group. – Have each hole long enough that there will be a drive, approach, and a putt. Or a long drive and a putt. – Have some fun with it – after going through a few times, have each group make up their own hole and have the other groups play the new course.
Wrap Up
– Find out all about the courses in your local area so you can tell your students where they can play ( PDGA Course Directory). – Briefly mention the PDGA and how if they’re traveling anywhere in the world, they can find the closest course by going on the PDGA website.
Freestyle
Introduction to Flying Disc Freestyle
Freestyle is an extended game of catch and throw where freestylers perform special “tricks” or maneuvers before performing the catch. These frisbee tricks can be simple, like a quick tip to an under the leg catch, or quite complicated. Freestyle is usually distinguished from other frisbee sports because it uses the nail delay, what people commonly think of as “spinning the disc on your finger.” Freestylers use the nail delay to set up all kinds of frisbee tricks like rolls, brushes, tips, pulls, and catches. Freestyle can be done by anyone, anywhere. Easy to play, difficult to master.
Twirling
- One finger – start off by hanging the frisbee off your index finger. Pull the frisbee towards you and around in a circle, attempting to twirl the frisbee on your finger.
- Switch fingers – As you are twirling the frisbee on one finger, try to switch fingers, going from your index finger, to middle, to ring, to pinky. As an added challenge, try to start on your thumb and work all the way to your pinky finger.
- Switch hands – as you are twirling the frisbee on your index finger, try to transfer the frisbee to your index finger on your other hand. As an added challenge try to go back and forth.
- Upside down – start off with the frisbee upside down on the ground. Start by twirling the disc around your finger, and attempt to pick the disc up off the ground. This will take some patience and practice, but once you can figure out the technique, you’ll be able to keep the disc twirling upside down. It’s similar to hula hooping – you’ll want to try and hook your finger as the disc is twirling so that it doesn’t fall as you have the disc upside down.
Body Throwing & Catching
- Under the Leg
- Throw – left your leg and throw the disc under your leg, attempting to catch the disc normally. Try with your non throwing hand, and alternate throwing under each leg.
- Catch – gently toss the disc up in the air, and try to catch it under your leg. Try to alternate hands and alternate catching it under each leg. As an added challenge, try to throw the disc under your leg and catch it under your leg.
- Behind the Back
- Throw – Throw the disc behind your back and attempt to catch the disc normally. Alternate throwing between hands.
- Catch – Toss the disc up and attempt to catch behind your back. Attempt to alternate throwing between hands, and catching between hands.
Air Brushing
Frisbees spin in two directions – clockwise and counterclockwise. Start off by gently tossing the disc vertically in the air. Think of the frisbee like a clock, with the bottom of the frisbee representing 6 o’clock. Brush your hand across the disc at 6 o’clock, keeping the disc spinning in the same direction that you originally threw it up.
Body Roll
Start off holding the disc in one hand and using either the opposite hand or the same hand that’s holding the disc (by flicking your wrist), try to roll the disc along your arms and chest and finish with the disc in your opposite hand. You will want to lean back and bring both of your arms up so it creates a “C” so you can attempt to have the frisbee roll down your arm, across your chest, and back up the other arm. You don’t need to have a lot of spin on the disc as the disc will gently roll.
Combos
Similar to skateboarding, you can combine multiple tricks together to create a “combo”.
For example – throw the disc under your leg, brush the disc, chest roll the disc, and catch the disc behind your back. You can make the combos as simple or as complicated as you’d like. A combo is at least 2 tricks together in sequence, connecting the throw to the catch.
Create Tricks
The great thing about Freestyle is that because there are more than 150 ways to throw, and endless ways to catch, Freestyle itself has infinite possibilities.
Make up a throw – make up a catch – make up a trick!
Invent Games
Frisbee is incredibily flexible so this module is about exploring what is possible with a disc. With more than 150 ways to throw a frisbee, and infinite catches, this module is all about letting your students have fun, use their imagination, get creative, and explore ways to play with a flying disc. We have included a game that you can start with to get them started.
Tip Game
This comes from Guts, which is the original disc sport, and was created more than 60 years ago. The tip game is similar to hacky sack, but with a disc. Typically you will want to have 5 or 6 students in a group and have them form a small circle. They will get one disc and the goal is to see how many times they can tip the disc with their hands, knees, and feet in a row. It only counts if they finish with a catch. For example, if they get 5 tips in a row but drop the disc it doesn’t count. If they get 3 tips in a row and catch the disc, then it counts as 3 tips. Start o by having them catch the disc with 2 hands and if they want to add a challenge, make it a rule that they have to catch using only one hand.
Play Catch, Invent Games
Have the students create a game within their group. The only parameters you’ll want to set is that they get one disc to use and the games have to be safe, and not interfere with the other groups. Have them also come up with a name for their game. After they have invented and played their game for a bit, you can bring everyone back in, and have each group introduce and explain their game. Then have the groups go back out to play – either trying out one of the games that they just learned or inventing a new game.
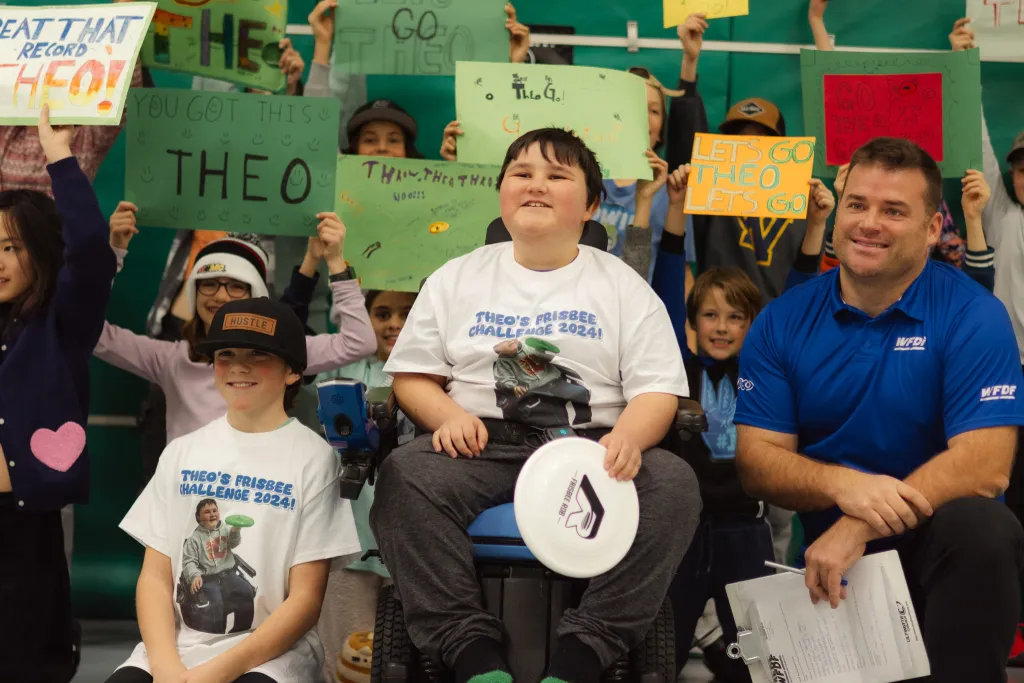
From “I can’t do this”…to “watch me try.”
Ready to create that moment?